Introduction:
Whether it is about allowing water to flow freely or preventing pine needles, leaves, and debris from collecting inside your gutters, installing gutter guards can be of huge help. Without this crucial component, you will be facing frequent clogs and other water obstruction problems that affect the regular functioning of your gutters. But the question remains, “How to install gutter guards?” Hence, we have created this easy-to-follow DIY gutter guard installation guide for you with expert tips from professionals.
Supplies You Need for Smooth Gutter Guard Installation:
Being an invaluable addition to your home, gutter guards come with a wide range of benefits. While they may seem to be simply just blocking debris, in reality, they do a lot more, like mitigating serious problems like mold growth, foundational problems, and water damage, and ultimately saving you from a lot of cleaning and maintenance expenses. But it is important to know what tools you’ll need for their successful attachment during gutter installation:
Here’s all you need for an at-home gutter guard installation:
- Tin snips or scissors.
- Tape measure.
- Drill or screwdriver.
- Safety goggles.
- Gutter guards (pre-cut or rolled).
- A sturdy ladder.
- Work gloves.
A 5-Step Guide to Gutter Guard Installation:
Many homeowners find it hard to install their gutter guard themselves and immediately resort to calling a professional installer. But with some basic tools and a user-friendly guide, you can DIY this process at home in very little time. From setting a clear foundation for the job to carrying out the final inspection, a lot goes into the process, which is why you need a guide to help you out.
Let’s take a look at 5 steps you need to follow for an easy and efficient gutter guard installation:
a. A clean foundation for a fresh start:
The first step is to clean your gutters with heavy-duty gloves and remove any dirt or leaves already accumulated. You can also go in with a small scoop or garden trowel. Flush out the remains with a garden hose and make sure there is no clogging in the downspouts. Skipping this step would be a recipe for destruction and cause blockages in the future.
b. The right measurement for the best look:
Calculate and write down the total length of your gutters with a tape measure by starting at one end of the house and running it along the entire length. Don’t forget to double-check to prevent purchasing the wrong size. For rolled gutter guard installation, you will need to cut them to fit. For this, use heavy-duty scissors or tin snips. Remember, getting the right-sized panels is important.
| Pro Tip:
Don’t forget to check your local climate conditions as well as your gutter system before purchasing gutter guards, as different gutter guards are available for different needs. |
c. Time to attach:
Carefully go through the manufacturer’s instructions to understand how to attach the particular gutter guard you’ve purchased. We have detailed the gutter installation procedure for 2 common gutter guard types:
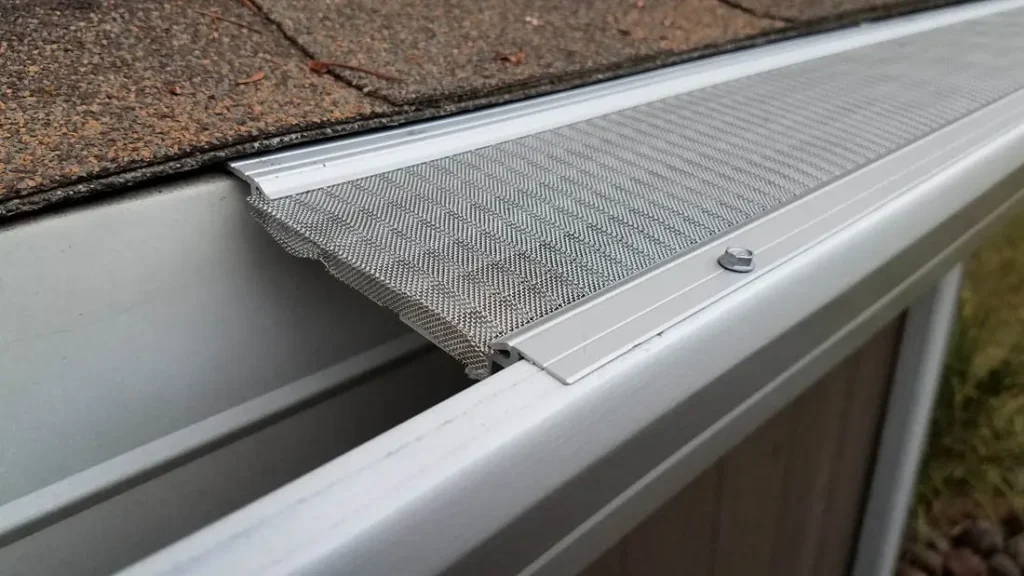
- For screw-on guards, position them on the gutter to sit flush against the edges. Fasten in place with clips or screws while tightening them enough to prevent movement over time.
- For snap-on guards, align them with the gutter edge and press until they click into place. Snap the guard securely without leaving gaps while moving along the gutter length.
d. Overlapping for a seamless fit:
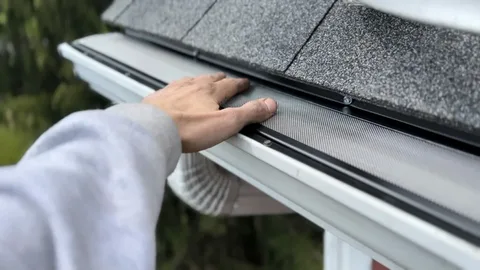
When installing multiple panels, create a seamless fit by overlapping the edges to prevent creating any unwanted spaces for twigs, leaves, and small debris. Either use zip ties, screws, or adhesive clips to secure the overlapping sections. Tightly fasten the guards while running your hand along the edges to get a professional finish and much better functionality.
e. A thorough inspection:
Now, finally, it is time to test whether your gutter guards are working properly or not. Observe the water flow while running it through the gutters with a garden hose. Make sure there are no leaks or pooling, and fix any part that is misaligned. This step is crucial to guarantee that your gutter guard installation process was successful and will save you from frequent repairs in the future.
| Did you know?
Even after you have added guards during gutter installation, you still need to carry out regular inspection and maintenance procedures twice a year for smooth-flowing water. |
Conclusion:
Installing guards is a very important step in gutter installation, as they keep your gutters running smoothly for years to come. Many homeowners find it hard to allocate their budget to hire professionals for installing guards during the gutter installation process. This is why we have created this comprehensive guide, which enlists all the tools you need as well as the steps to follow during guard attachment during gutter installation.
FAQs:
What is the easiest gutter guard to install?
Foam gutter guards and brush gutter guards have the easiest installation procedures.
What is the warranty for gutter guards?
Different manufacturers offer different kinds of warranties, but most depend on the product and the installer.
How long does it take to install gutter guards?
In general, the whole process, including the pre-installation cleaning, can take around 3-5 hours.


